A useful beat-making video shows a musical decision and lets the viewer hear its result. Capture clean DAW audio, record the screen at a readable size, add a camera only where it helps, and keep enough material to show the before and after. You can choose the story after the session instead of performing every idea for a recording button.
Choose one moment the viewer can follow
A strong clip might show a drum change, a sample chop, a bass line entering or a sound transformed by one effect. It does not need to explain the entire project.
Keep three pieces when editing: enough context to recognize the starting point, the decision itself and enough playback to hear the result. Cutting away immediately after the tweak can remove the payoff. A long introduction can hide it.
For a longer YouTube walkthrough, connect several decisions with brief explanations. For a short vertical clip, choose one clear change and make the relevant control readable. These are editorial choices, not promises about an algorithm.
Capture direct music, not just the room
A phone pointed at speakers records the room along with the beat. That can be intentional for a live studio atmosphere, but it is a poor substitute for a clean DAW mix when you want listeners to judge a sound.
Use a digital route from the DAW into the recorder. Follow the FL Studio or Ableton setup and verify the saved audio. Use a separate narration mic if you want to explain the work.
If a phone records a second camera angle, make a visible/audible sync event. Preserve the original recordings so you can align them later. Check longer takes for drift instead of assuming one initial alignment will last indefinitely.
Make the screen useful at the final size
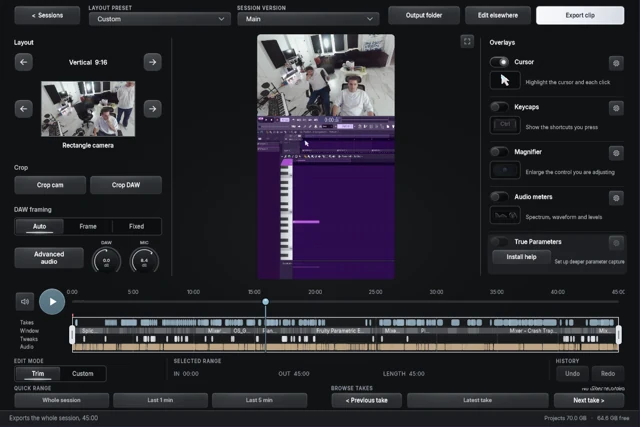
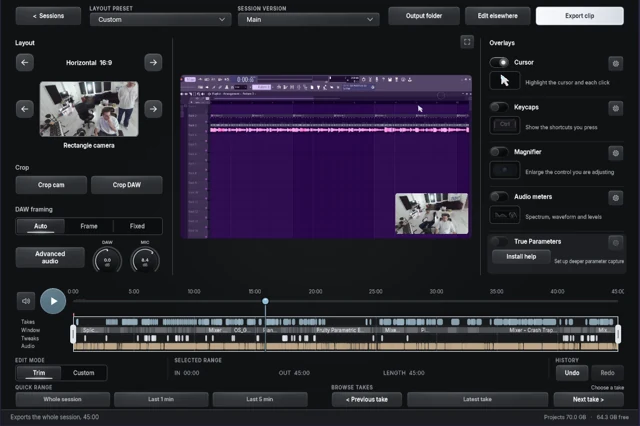
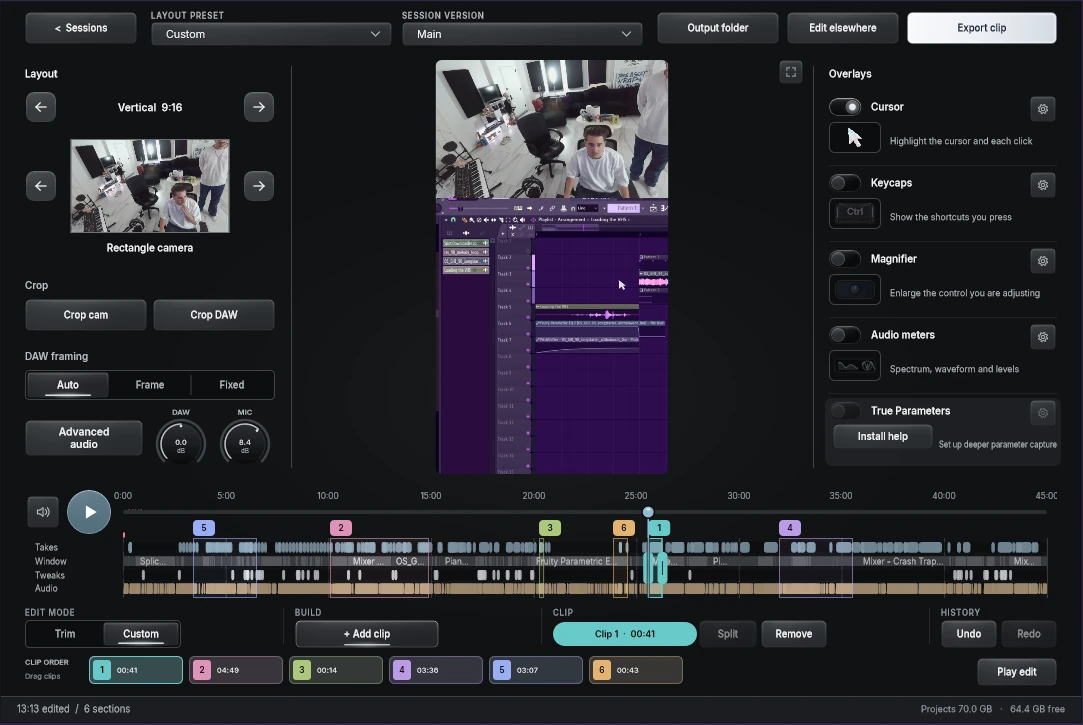
A full desktop contains more information than a small phone screen can communicate. Before the session, arrange the DAW so the important working area is visible. During editing, use a wider view for orientation and a closer crop when the viewer needs to see a control.
Do not zoom so tightly that the viewer cannot tell which track or instrument is changing. Keep camera overlays away from the action. A face reaction can add context after the sound lands; it need not cover the knob throughout the demonstration.
For a vertical composition, 1080 × 1920 is a common working canvas. It is an example layout size, not a guarantee of current platform upload requirements. Check the destination's current requirements before delivery.
Record without interrupting the session
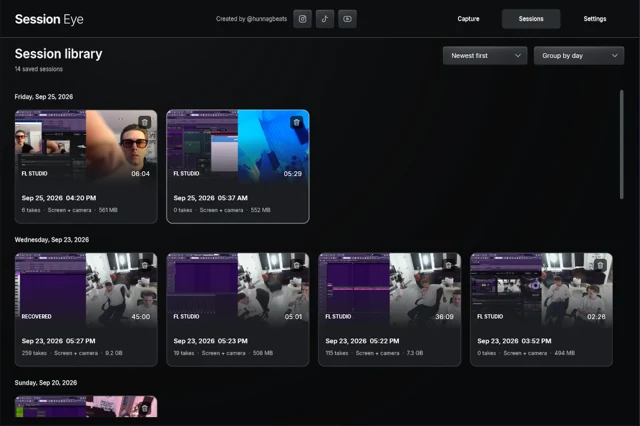
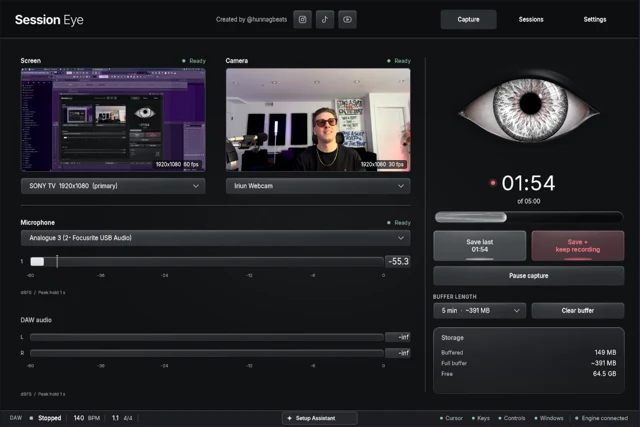
Continuous recording is straightforward, but it leaves a long file to review. A rolling buffer keeps a bounded recent history and lets you save when something becomes useful.
Session Eye keeps the production session—DAW audio, screen, camera, mic and activity context—so you can save a moment after it happens. Its editor supports multiple selected portions, separate mixes and different versions from the same capture.
OBS also has Replay Buffer, and is especially useful if you stream while producing. The difference is what you preserve for the edit: a standard composed scene versus an editable session workflow. See the rolling recording guide.
Build the first edit around listening
- Find the passage where the musical idea becomes clear.
- Include the earlier sound only as long as needed to hear the comparison.
- Keep the gesture or control change that explains the difference.
- Let the resulting beat play long enough to feel the change.
- Remove irrelevant waiting, but retain any pause that gives the musical transition its timing.
- Add narration only where the sound and picture do not explain the decision themselves.
Do not replace spontaneous audio with a later render without considering whether the visible actions still match. A final render is useful for a finished-song walkthrough, but it may erase the actual progression that makes a process video interesting.
Mix narration without hiding the beat
Keep voice and music separate so you can bring the explanation forward and let the beat recover afterward. Moderate ducking may help. Overly aggressive ducking can make a before-and-after comparison misleading because the volume change dominates the effect.
Listen without watching once. Then watch without sound. The first pass catches audio continuity; the second reveals whether the picture communicates the action. Finally, watch the export on the kind of device your audience will use.
If the footage fails
No audio: trace the DAW-to-recorder route. Tiny labels: reframe the original screen source if you retained it. Missing camera: check whether it was captured at all. Unsaved earlier moment: inspect available history, but do not expect a recorder to reconstruct time before it started.
Keep OBS for live broadcasts and an established scene workflow. Use session editing when you want to make music first and discover the best clip afterward. Either way, the finished piece should communicate a real musical choice, not simply prove that the screen was recorded.
Sources & details
Reviewed . The Session Eye examples show clip selection and a vertical composition. The production and editing suggestions are editorial guidance, not a performance benchmark.